Saturday, November 21, 2015

Where would you want to visit?


While going through pictures to create another post, I realized that I had not posted on this 4th grade lesson.  This is the third year that I have taught this lesson and have loved watching it evolve. As the first lesson of the year, I use it to teach about kinds of lines, color, and space. I was surprised this year when asking my 4th graders about environments, how unfamiliar they were with the word "environment."  

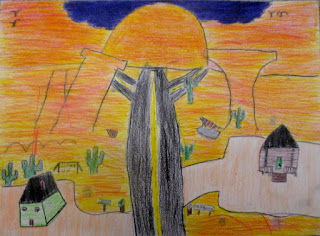
We looked at landscape paintings from a few artists, the two we looked at the most were David Bates and Ando Hiroshige. While looking at the paintings, students identified details of setting. They had to describe ways that the artist used color to show time of day, climate, and season. 

This year I found myself pushing the idea of overlapping to create space, as well as adding details to create more interest for their viewers. Students were prompted to choose any kind of environment they would like to visit; actual environments, fantasy environments, even space. The choice was theirs. We had a lot of beaches and mountains, a few outer space scenes, but the fun ones were places like Donut Land, Pizza Land, and a few Candy Lands.  

All students worked on 9x12" drawing paper, and used colored pencil. Always looking for ways to improve, feel free to comment and let me know if you have any ideas.




Thursday, November 12, 2015

Students working together for an exciting message to their school


Our first completed project with my After School Art Class. This is my first year working with the After School Program. The goal for this group is to spend the year working on collaborative art projects to fill the halls and walls of our school with Art, large art. 
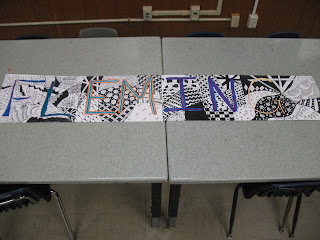
For our first project, we started with the students working together with a phrase that they wanted to hang in the hallways of the school, a message for our school. The students brainstormed as a group and decided upon "School Rocks Go Roadrunners." I helped them space out and size up their lettering with about two letters per page. Some pages had a connected line that connected to the words. They learned how to leave a letter sized space between words. 

After that, students  traced over their letters with their choice of two or more washable markers. 
We then divided our papers using about four lines, creating around 12 spaces to fill with Zentangle patterns. Students then filled their spaces with patterns using pencil to plot out their design and sharpie to finish it. 

Students had the decision to work on a page individually or with a small group. Almost all students chose to work on their pages individually at first, then after a few times of working on this realized that they could get a page finished faster with a friend, started teaming up. 

It did take some time to complete, but the students had a lot of fun. Some students stuck to the Zentagle patterns from the books I have, but others started creating their own patterns.

The group I have after school is made up of a mix of 3rd, 4th, and 5th graders. It was very interesting to see how they interact and work together with students of other grade levels. At this point they are starting to not really care about grade levels while working or choosing partners to work with. This really started to make for some fun conversations to listen to as the younger students try to impress the older ones, and the older ones try to help the younger ones. I hope to continue to see a healthy growth of social skills and team work.


 Letting the students take pictures of us hanging this long artwork on the hallway made for a few blurry shots, but hey, I am o.k. with it.


A few students who started with us latter made one for my classroom. Unfortunately it is so long, I can not find the space to hang it yet.

Hope you enjoy. Leave any comments you have with constructive criticism on the project, or my blog writing. Always searching for improvement.